Headroom, in the context of audio and music engineering, is the difference between the highest level of sound a system can reproduce without distortion and the level at which audio typically operates.
It’s akin to a safety net, ensuring that unexpected surges in volume, whether from a soaring guitar solo or a singer’s powerful crescendo, don’t result in unwanted distortion. In essence, it’s the wiggle room that keeps your audio pristine and unclipped.

Why Should You Care About Headroom?
A Pillar of Superior Audio Production
At the heart of every crystal-clear track or recording lies an understanding of headroom. It’s not merely a jargon term thrown around in studios; it’s the linchpin of pure, undistorted audio. Without the right amount of headroom, what might have been a harmonious tune can easily devolve into a jarring cacophony.
The Undeniable Impact on Sound Quality and Clarity
Consider this – you’re engrossed in a song, every note resonating, every instrument distinct, and then suddenly, a distorted blare jolts you out of the experience. That’s the adverse effect of inadequate headroom. Proper management of headroom ensures each component of a track retains its clarity, offering listeners an immersive experience. It’s the fine line between a track that resonates and one that repels.

Who Needs to Know About Headroom?
Not Just for the Pros
While the term might be thrown around more frequently in professional studios, understanding headroom is crucial for anyone involved in audio. From music producers orchestrating the next big hit to instrumentalists recording their solos, knowledge of headroom can elevate the quality of any audio project.
A Must-Know for Every Audio Enthusiast
Whether you’re dabbling in sound mixing as a hobby or are a seasoned audio engineer, grasping the concept of headroom is non-negotiable. It’s the secret sauce that can transform your audio from good to outstanding, ensuring every beat, note, and voice is captured in its purest form.
What is Headroom: Table of Contents
At its essence, headroom is the sonic space between the normal operating level of an audio signal and the maximum level the system can handle without distortion. It’s the buffer that ensures sudden spikes in sound, whether from a powerful guitar riff or an unexpected vocal crescendo, don’t result in a distorted mess.
Definition and Significance in Audio Signals
Headroom isn’t just about preventing distortion; it’s about preserving the integrity of every sound wave, ensuring that each nuance and detail is captured and reproduced accurately. It’s the difference between audio that feels real and immersive and audio that feels compressed and artificial.
The Magic Behind Crisp and Clear Audio Tracks
Ever wondered why some tracks sound so vivid, almost as if you’re in the same room as the musicians? A significant part of that magic is due to well-managed headroom. It ensures that every instrument, every voice, and every beat is presented in its purest form, free from the constraints of clipping or distortion.

The Role of Headroom in Music Production
In the world of music production, where every note matters, understanding and managing headroom is paramount.
How It Shapes Sound Quality
Headroom is like the unsung hero behind a track’s sound quality. While it might not be the most glamorous aspect of music production, it’s the foundation upon which all other elements rest. Proper headroom ensures that each instrument and voice retains its distinct character, allowing for a richer, more layered sound.
The Balance Between Loudness and Clarity
In today’s age of streaming and digital music, there’s a constant push to make tracks louder and more ‘in-your-face. However, without adequate headroom, this pursuit of loudness can come at the cost of clarity. Headroom provides the balance, ensuring that tracks are loud enough to make an impact, yet clear enough to be enjoyed in all their intricacies.
The Intricate Science Behind Headroom
The realm of audio engineering is filled with nuances, and among the most pivotal yet often overlooked is the concept of headroom. While it might seem like just another term in the vast lexicon of audio production, understanding the science behind headroom can be the difference between an average mix and a masterpiece.
Technical Deep Dive into Headroom
Every audio device, from the simplest earbuds to the most sophisticated studio equipment, has a limit to the loudness it can handle. Push beyond this limit, and the result is distortion. This is where the concept of headroom comes into play.
How Audio Devices Measure and Manage Headroom
Audio devices use a scale, typically measured in decibels (dB), to gauge the loudness of a signal. The maximum point on this scale is the point of distortion. Headroom is the difference between this maximum point and where the audio signal typically operates. Devices are designed to ensure that under normal conditions, the audio signal remains well below the distortion point, providing a buffer for occasional loud spikes.
Equipment Headroom vs. Mix Headroom
While both terms revolve around the same fundamental concept, they cater to different aspects of audio production. Equipment headroom refers to the buffer built into audio devices to prevent distortion. It’s a fixed value determined by the device’s design. On the other hand, mix headroom is more dynamic. It pertains to the space left in a mix to accommodate further processing, such as mastering, without causing clipping or distortion. This can be adjusted by the audio engineer during the mixing process.
Unraveling the Crest Factor
Beyond the basic understanding of headroom lies a more advanced concept that’s crucial for professionals: the Crest Factor.
Introduction to the Crest Factor
The Crest Factor is a measure of a signal’s dynamic range. It’s calculated by taking the ratio of the peak levels (the loudest parts) to the RMS (Root Mean Square) level, which represents the average loudness. A high Crest Factor indicates a track with significant dynamics, such as a classical piece with soft melodies and booming crescendos.
Significance in Understanding Headroom
The Crest Factor plays a pivotal role in determining the headroom required for a track. A track with a high Crest Factor will need more headroom to accommodate its dynamic range without causing distortion. Conversely, a track with a low Crest Factor, like many modern pop songs, can operate with less headroom.
How It Affects the Dynamics of a Signal
The Crest Factor isn’t just a theoretical concept; it has practical implications. A track’s dynamics, shaped by its Crest Factor, can influence the emotional impact on the listener. Too little headroom can squash these dynamics, making the track sound flat and lifeless. Properly managed headroom, informed by the Crest Factor, ensures that the track retains its emotional peaks and valleys.

The Dark Side: When Headroom Goes Wrong
In the vast soundscape of audio production, there’s a lurking shadow that every producer fears: the consequences of mismanaged headroom. While understanding headroom’s importance can elevate a track to sonic perfection, neglecting it can lead to a cascade of audio issues. Let’s delve into the pitfalls of overlooking headroom and the havoc it can wreak on your production.
The Dreaded Clipping: A Producer’s Nightmare
Every audio engineer has faced it at least once: the jarring, distorted sound that interrupts an otherwise perfect track. This unwelcome guest is known as clipping, and it’s a direct result of mismanaged headroom.
Understanding Clipping and Its Detrimental Effects
Clipping occurs when an audio signal exceeds the maximum level a system can handle. Instead of a smooth waveform, the peaks are “clipped” off, leading to distortion. This not only disrupts the listening experience but can also damage audio equipment. The nuances of the track get lost, replaced by a harsh, grating sound that’s far from the intended production.
Real-World Examples of Poor Headroom Management
Consider a live concert recording. The crowd’s roar, the sudden guitar solos, the powerful vocals—all these dynamic elements require ample headroom to be captured accurately. Without it, the recording might sound muddled, with the crowd’s cheers causing distortion every time they reach a crescendo. Or think of a podcast interview where one speaker’s laughter causes the audio to clip, turning a joyful moment into a jarring listening experience.
The Risks of Ignoring Headroom
While clipping is a glaring issue, it’s just the tip of the iceberg. Ignoring headroom can lead to a plethora of problems that compromise the integrity of an audio track.
The Importance of Avoiding Distortion and Unpleasant Artifacts
Beyond clipping, inadequate headroom can introduce other unwanted artifacts. These can range from subtle background noises to noticeable pops and clicks. Such artifacts not only distract the listener but also degrade the overall audio quality, making it seem amateurish and poorly produced.
How It Can Make or Break Your Audio Track
Imagine a beautifully composed piece of music, where each instrument is meticulously recorded. Now, imagine the same track with distorted vocals, the piano notes clipping, and the subtle guitar strums lost in a sea of noise—all because of neglected headroom. The difference is stark. Proper headroom management preserves the soul of the track, ensuring every note, beat, and voice is heard as intended.
The Art of Mixing and Mastering with Headroom
The world of audio production is a delicate dance of precision, creativity, and technical prowess. At the intersection of these elements lies headroom, a concept that, when harnessed correctly, can elevate a mix from good to extraordinary. As we delve into the nuances of mixing and mastering, it becomes evident that headroom is not just a tool but an artist’s ally in crafting sonic masterpieces.
Why Headroom is a Mixer’s Best Friend
Every mixer, whether a seasoned professional or a budding enthusiast, knows the challenges of blending multiple tracks into a cohesive whole. The balance, the dynamics, the clarity—each aspect plays a pivotal role. And in this intricate process, headroom emerges as a silent yet powerful partner.
The Role of Headroom in Achieving a Clear Mix
Imagine painting on a canvas. The more space you have, the more freedom you possess to layer colors, add details, and create depth. Similarly, in audio mixing, headroom provides the space needed to layer sounds without them overlapping and causing distortion. It ensures that each track retains its distinct character, even when played alongside others. Whether it’s the subtle undertones of a bass guitar or the sharp notes of a violin, headroom ensures that every element shines through in the mix, free from the constraints of clipping.
The Synergy of Multiple Tracks and Their Combined Signals
One of the marvels of mixing is the creation of a soundscape that’s greater than the sum of its parts. Multiple tracks, each with its unique timbre and dynamics, come together to form a harmonious ensemble. But this synergy is possible only when there’s adequate headroom. It acts as the buffer that accommodates the combined signals of multiple tracks, ensuring that the final mix is both loud and clear. Without sufficient headroom, tracks might compete for space, leading to a mix that’s muddled and lacks definition.
Crafting the Perfect Sound: Managing Headroom
In the realm of audio production, achieving the perfect sound is akin to finding the Holy Grail. It’s a pursuit that requires precision, knowledge, and a deep understanding of the tools at one’s disposal. Central to this quest is the concept of headroom. While it might seem like a straightforward term, managing headroom is an art, riddled with myths and misconceptions. Let’s embark on a journey to demystify headroom and explore techniques to harness its full potential.
Debunking Myths About Creating Headroom
The world of audio is not immune to myths, and when it comes to headroom, there’s no shortage of misconceptions that can lead producers astray.
Common Misconceptions and Truths
- Myth: More headroom always equals better sound quality.
- Truth: While headroom is essential, excessive headroom can lead to a weak mix that lacks punch. It’s about finding the right balance.
- Myth: Digital systems don’t need as much headroom as analog.
- Truth: Digital systems have a hard clipping point at 0 dBFS. Exceeding this can lead to harsh distortion, making headroom management crucial in digital environments.
How Modern Technology Has Changed the Game
Gone are the days when managing headroom was solely about manual adjustments and analog meters. Today’s digital audio workstations (DAWs) come equipped with advanced tools that provide real-time insights into headroom levels, allowing for precise adjustments. Moreover, modern plugins and processors are designed with headroom in mind, ensuring that even when pushed to their limits, they retain audio integrity.
Pro Tips for Optimal Headroom
Mastering the art of headroom management can elevate your audio production to professional standards. Here are some insights to guide you:
Techniques for Maintaining Appropriate Levels
- Gain Staging: Start with proper gain staging. Ensure that each track’s level is set appropriately before it enters any effects or processors. This foundational step can prevent a myriad of headroom-related issues down the line.
- Use of Compression: Compression can be a double-edged sword. While it can help in managing dynamics, over-compression can squash your mix. Use it judiciously to preserve the natural dynamics while ensuring optimal headroom.
- Avoiding the Loudness War: In the race to make tracks louder, don’t sacrifice headroom. A dynamic track with ample headroom will always sound better than a squashed, loud mix.
The Role of Level Meters in Real-Time Headroom Management
Modern DAWs come equipped with a range of meters that provide insights into various aspects of your mix, including peak levels, RMS levels, and more. These meters are your eyes into the world of headroom. Regularly monitor them to ensure your mix stays within the desired range. Tools like VU meters, LUFS meters, and peak meters can provide a comprehensive view of your track’s headroom, allowing for timely adjustments.
Peak vs. RMS: The Loudness War
In the vast universe of audio production, the battle for loudness rages on. As producers strive to make their tracks stand out, they often find themselves caught between two critical measurements: Peak and RMS. Understanding the nuances of these measurements is pivotal in navigating the loudness war without sacrificing the sanctity of headroom. Let’s delve into these concepts and unravel their significance in the modern audio landscape.
Deciphering Loudness Measurements
Loudness, in the context of audio, isn’t just about volume. It’s about perception, dynamics, and the intricate balance that ensures a track feels powerful without sounding distorted. Two metrics stand at the forefront of this balance: Peak and RMS.
Definitions and Differences Between Peak and RMS
- Peak: This measurement represents the absolute highest level an audio signal reaches. It’s a snapshot, capturing the loudest moments, like the crash of a cymbal or a sudden vocal shout. However, peak levels can be fleeting and don’t necessarily represent the overall loudness of a track.
- RMS (Root Mean Square): Think of RMS as the average loudness of a track. Instead of focusing on momentary spikes, RMS provides a more holistic view, considering the entire duration of the audio. It’s akin to the sustained energy of the track, giving a better representation of how “loud” a track feels to the human ear.
Practical Applications in Audio Production
- Balancing Dynamics: While peak levels ensure that the audio doesn’t clip or distort, RMS levels provide insights into the track’s overall energy. By monitoring both, producers can craft tracks that are dynamic yet consistent in their energy.
- Mastering for Platforms: Different streaming platforms have varying loudness standards. By understanding peak and RMS levels, producers can master their tracks to meet these standards, ensuring consistent playback across platforms.
- Preserving Headroom: A track with high peak levels but low RMS might sound dynamic but weak. Conversely, a track with high RMS but close peak levels might lack dynamics. By balancing the two, producers can maintain optimal headroom, ensuring clarity and punch in their mixes.
Navigating Headroom in the Digital Age
The digital revolution has transformed the landscape of audio production, introducing a plethora of tools, technologies, and techniques. However, with these advancements come unique challenges, especially when it comes to managing headroom. The principles of headroom remain consistent, but the digital realm has its quirks that every modern producer must be aware of.
Digital Audio and Its Quirks
The shift from analog to digital has been monumental, offering precision, flexibility, and a vast array of processing capabilities. But, as with any technology, understanding its intricacies is crucial to harnessing its full potential.
Understanding Clipping Points in Digital Systems
In the analog world, exceeding headroom often resulted in a warm distortion, which, in some contexts, was even desirable. However, digital systems are less forgiving. When the audio signal surpasses the maximum allowable level in a digital system, it results in clipping. This clipping isn’t a gentle saturation but a harsh truncation of the audio waveform, leading to distortion that’s often described as “cold” or “brittle.”
The Significance and Challenges of 0 dBFS in Digital Audio
0 dBFS (decibels Full Scale) is the loudest level in digital audio. Unlike the analog domain where there’s some wiggle room above 0 dB, in digital audio, 0 dBFS is an absolute ceiling. Any attempt to push the audio beyond this point results in clipping.
This rigid ceiling poses challenges, especially in dynamic mixes where sudden peaks can easily breach the 0 dBFS limit. Producers must be vigilant, ensuring their mixes stay below this threshold while still maintaining the desired loudness and dynamics.
Another challenge with 0 dBFS is the misconception that tracks should be normalized to this level for maximum loudness. While it might make the track louder, it can compromise dynamics and lead to unintentional clipping, especially after post-processing or when played back on different systems.
Practical Wisdom: Ensuring Adequate Headroom
In the intricate ballet of audio production, headroom stands as a pivotal pillar, ensuring the dance between various elements remains harmonious and free from distortion. But how does one practically ensure that headroom is always in check? Let’s dive into some hands-on techniques and tools that every audio enthusiast should have in their arsenal.
Mastering Gain Staging
Before diving into complex mixing techniques, one must master the foundational art of gain staging. It’s the backbone of a clean mix, ensuring each element sits perfectly in the soundscape.
What It Is and the Secrets to Doing It Right
Gain staging is the process of setting appropriate levels for each element in a mix, ensuring they don’t clip while providing enough headroom for post-processing. The secret? Always start with the individual tracks. Before adding effects or processing, ensure each track’s level is set optimally.
Real-World Scenarios and Solutions
Scenario: You’ve recorded a vocal track, but during the chorus, the singer’s powerful notes are causing clipping.
Solution: Reduce the gain of the vocal track during the chorus, ensuring it stays below the clipping point. This might mean the verses are quieter, but this can be addressed later during the mixing process.
The Analog Charm: VU Meters
Even in our digital age, some analog tools remain relevant, offering insights that digital meters can’t. The VU (Volume Unit) meter is one such tool.
Their Role in Analog Systems and Their Relevance Today
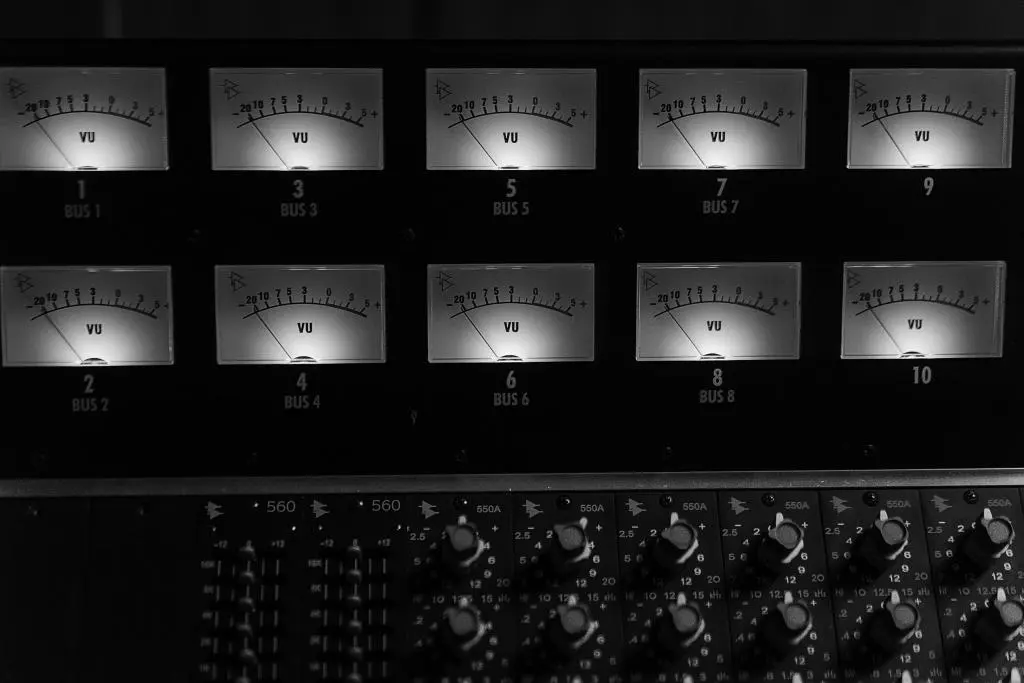
VU meters measure the average level of an audio signal, providing a representation that’s closer to how our ears perceive loudness. In the analog era, they were crucial in preventing tape saturation. Today, they offer a different perspective from digital peak meters, helping producers achieve a balanced mix.
Tips for Using VU Meters Effectively
- Calibrate your VU meter to your system. Ensure 0 VU corresponds to an optimal level below digital clipping, often around -18 dBFS.
- Remember, VU meters are slower than peak meters. They won’t catch transient spikes, so use them in conjunction with digital peak meters.
The Signal-to-Noise Ratio Balance
In the quest for perfect sound, the signal-to-noise ratio plays a crucial role. It’s the balance between the desired audio signal and unwanted background noise.
Importance and Techniques to Maintain a Good Signal-to-Noise Ratio
A high signal-to-noise ratio ensures that the audio is clear and free from distracting noise. To maintain a good ratio, always record at optimal levels, use high-quality cables, and minimize electronic interference.
How Signal-to-Noise Ratio Impacts Headroom and Overall Audio Quality
Noise eats into your headroom. If there’s too much background noise, you might be tempted to increase the gain of the desired signal, risking clipping. By maintaining a high signal-to-noise ratio, you ensure ample headroom and pristine audio quality.
Monitoring Like a Pro
Monitoring is the act of keeping a close eye (or ear) on your audio levels, ensuring everything stays within the desired range.
Using Peak Levels and RMS Meters for Optimal Results
While peak meters show transient spikes, RMS meters provide an average level, giving a holistic view of your audio’s loudness. Use both to ensure your mix is dynamic yet free from clipping.
Tools and Software Recommendations
DAWs like Pro Tools, Ableton Live, and Logic Pro come equipped with advanced metering tools. For standalone software, consider tools like iZotope Insight or Waves Dorrough Meter.

